It is necessary to understand the concept of the flows while one is planning to import or export into different environment. Follow the below to steps to use this method for Import & Export to different environment. ( Don’t miss the ending) .
Step 1 – First go to the Microsoft power automate page and select the flow and click on export.
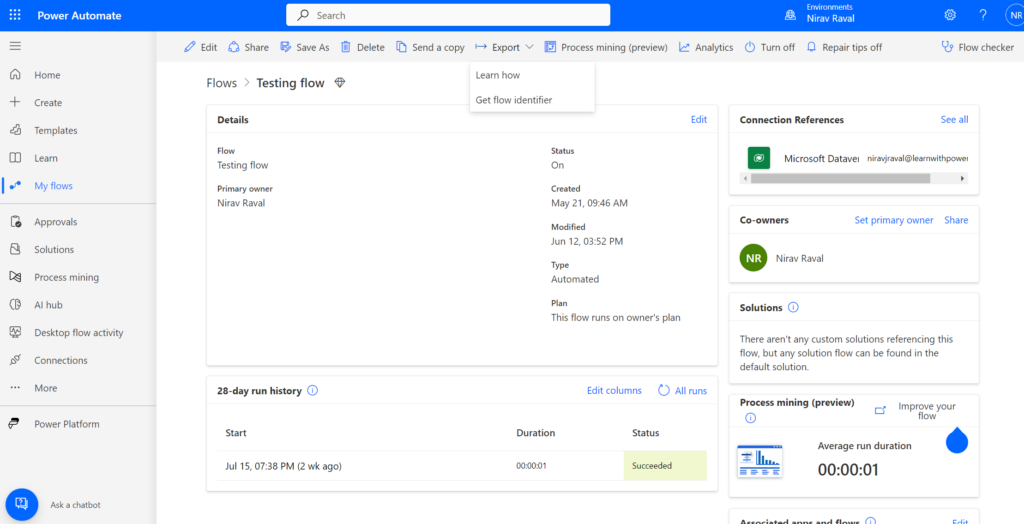
If user is not able to see the export package (zip) option, use the below steps to export the automate flow.
Step 2 – Select the flow and check the URL link on the browser what it is defining
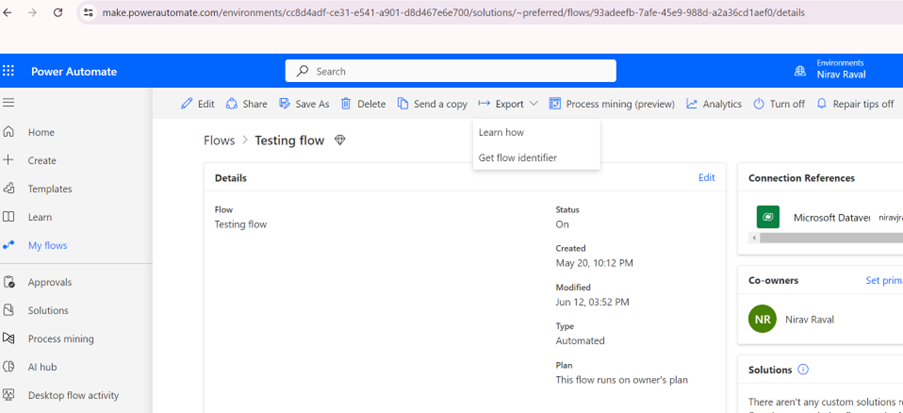
The URL is showing /details in the end of it, now go to the URL.
Step 3 – Change the URL and replace details with export /details to /export.
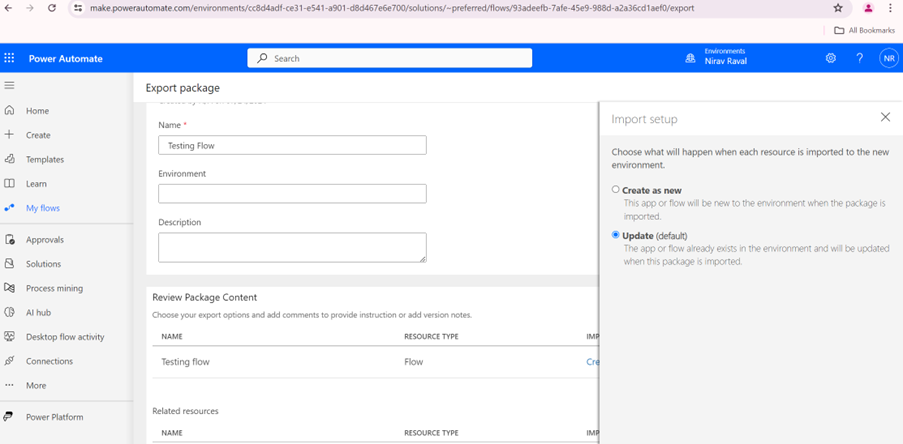
Step 4 – Select create as new and then export the flow by selecting, Review package content – Import setup as > Create as new Relate resources – Import setup as -> Select during import.
Step 5 – Click on export then click on download.
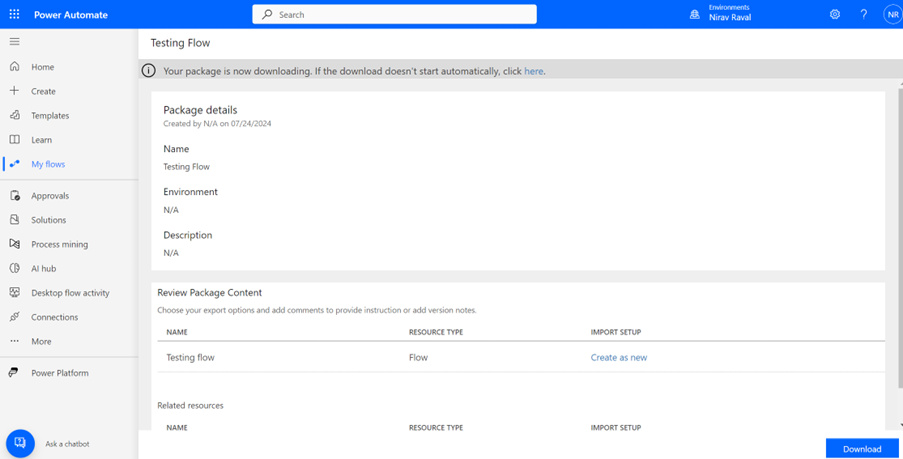
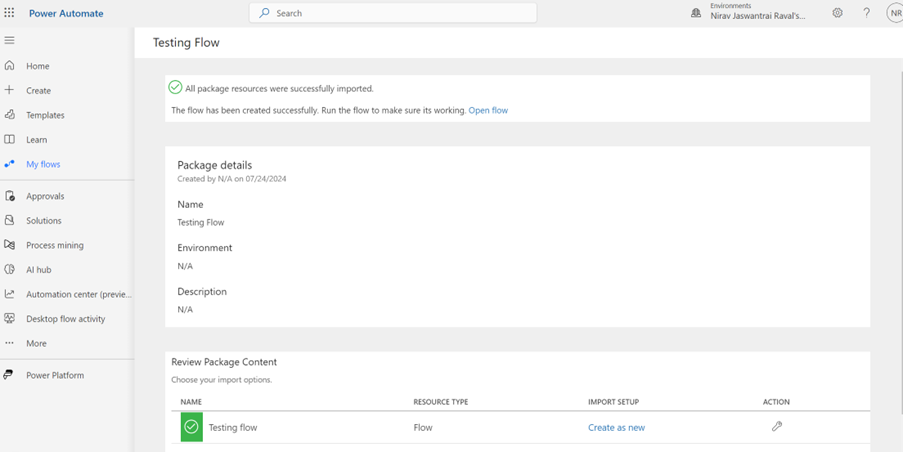
Step 6 – Zip file will be downloaded, then import the file to the new environment.
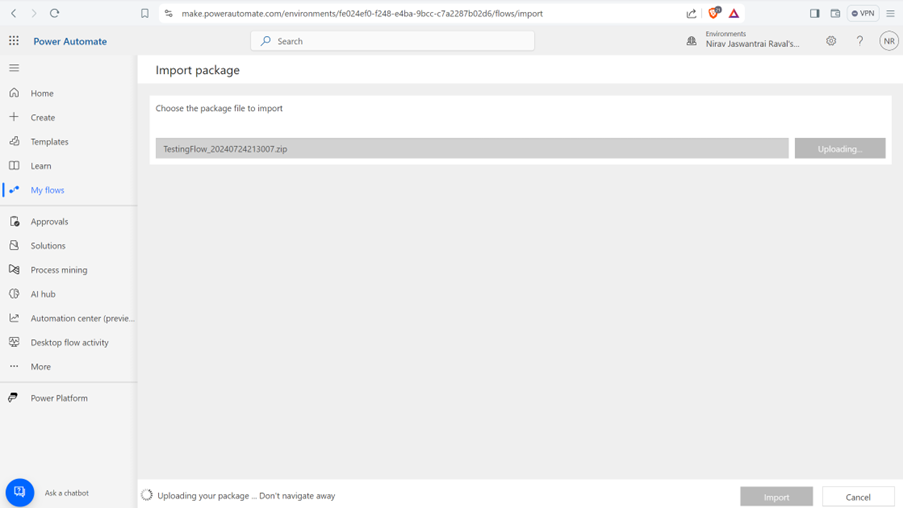
Step 7 – Finally, the flow will get successfully imported into the environment.
Notes by Akira28 – As you have reached this far, make sure to keep below points in mind before importing and exporting the power automate flow.
- Connection References
- Resource References
- Version Control
- User Permission
- Variable Initialization and configuration
- Testing & Validation
